
Quick Steps: TicketDesq > Select Event > Basic Information
This step will take you through setting up the Basic Information for your Form, what each different area means and how you can fully utilise it for your online ticket sales.
1. Within the Management Console, select TicketDesq from the top menu, then click on the name of the event form
2. Select Basic Information from the left menu.
3. Click Edit at the top of the page.
4. Now you can set up all of the basic details that make up your form.
You have already set up your Form Name and Dates in the first step, now its time to complete the rest of the information. Use the information below to guide you how to complete each section and whether it is relevant to your form.
General:
- Location: Insert the Location of the Event. If you use the name of the location found in Google Maps, you can allocate the Event Latitude and Longitude, it will also show the location of your venue on the front page of the TicketDesq form.
- Contact Details: The Contact should list the name of the main point of contact for the event, then below the main Telephone line and the event's Website.
- Email Addresses: There are two email addresses that can be collected. The Ticketing Email is the main email address for the event. The Contact Us Email can be set, this shows on the Contact Us page on the TicketDesq form. These two fields can all contain the same email address or different ones, it is up to you.
- Time Out (minutes): This function is how long the purchaser has at each stage of the ticket purchase process. After this amount of minutes, the page will time out and refresh back to the main page.
- Ticket resend: By selecting 'Yes', a Ticket Resend Tab will appear on the front end. Anyone who has purchased tickets, can select this option to have a copy of their tickets emailed to them.
- Facebook: By selecting 'Yes', the purchaser will have the option to login to their facebook account at the personal information stage of the ticket purchasing process.
- Google Analytics Tracking ID: SportsTG utilizes Google Analytics tracking codes throughout its range of products. To set this up please go to http://www.google.com/accounts. Setup a Google account and then go to http://www.google.com/analytics and create a website tracking code following the prompts. If you have any issues creating the analytics please view Google Analytics Help -http://www.google.com/analytics/support.html. During the analytics setup process you will be presented with some tracking code. Insert this tracking code into the Google Analytics Tracking ID Field. (Tracking Code should be similar to UA-XXXXXXX)
- Theme: Your theme is set up in the Tools menu
- Note Types:
- Timezone: Select the appropriate Timezone for your event so that your tickets close off at the correct time.
Summary:The Summary will display on the front page of your TicketDesq form providing potential ticket buyers information about your event before they purchase.
Dates:
- Start/End Date/Time: Set your start and end times for when tickets will be available for purchase.
- Title: This is your heading which directs ticket buyers on where to purchase tickets eg. Ticket Booking
- Button: Chosen words to purchase tickets eg. Click HERE for tickets
Queue:
Booking: Enter details here if you have a booking / processing fee to be added to each order.
Pre Approval: Please select 'Yes' if you need to pre-approve each purchased ticket.
Waiver: The Waiver is the Terms & Conditions that are associated with entry to the event. The Title is what you call the Waiver, eg Terms and Conditions, Entrant Declaration. You should then insert the waiver, and complete the Confirmation message. This is the statement that the entrant declares, and should be something like, 'I have read and agree to be bound by the above Terms and Conditions'.
Confirmation: The Confirmation is the message that displays once someone has purchased a ticket or tickets. This message displays underneath the purchaser's receipt number.
You also have the option of facebook integration and a sign up to an existing email database option.
Receipt: Here you have the option of a standard or customised receipt. The details entered here will appear on the confirmation email eg Name, venue, location, ticket details etc
Change: By selecting 'Yes', a Tab (Change title) will appear on the front end (as below). Anyone who has purchased a ticket, can select this option to change the ticket name and email address that was originally allocated to it. The ticket holder must click 'Yes' when asked if they want to Update
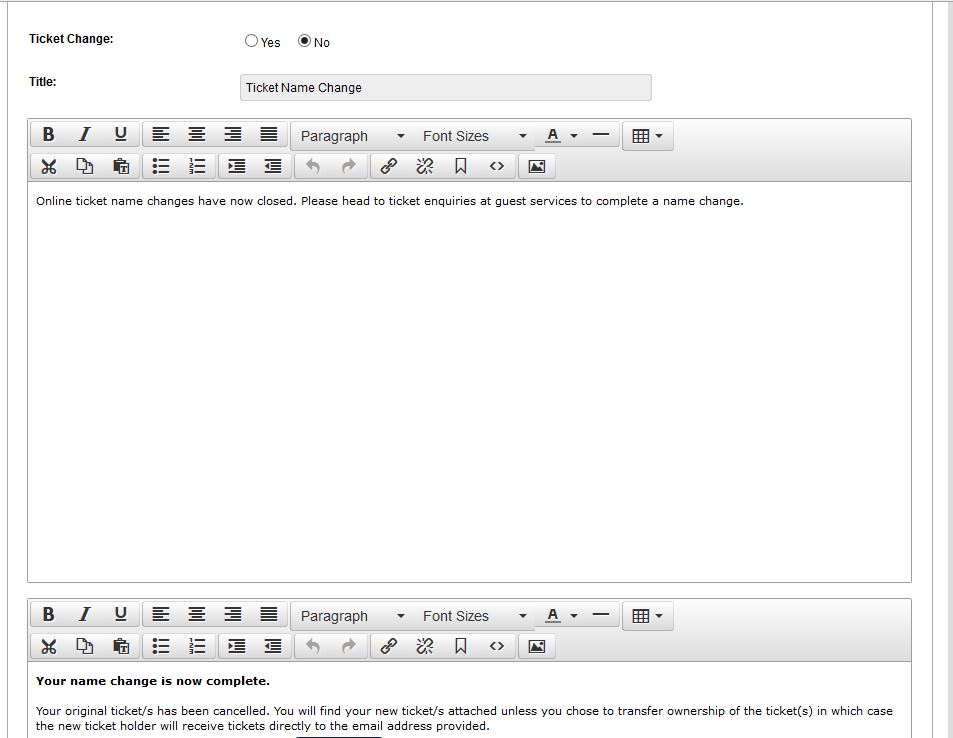
- HTML Box 1 - Add image here which will be allocated to the front end which appears under the "Change your ticket" heading (as above)
- HTML Box 3 - Add image here which will appear on the front end after and individual has selected their type and amount of tickets
- To add a 'Ticket change fee', please add this in Inventory > Select Ticket > Edit > Ticket tab > Ticket Change - Yes > Enter fee
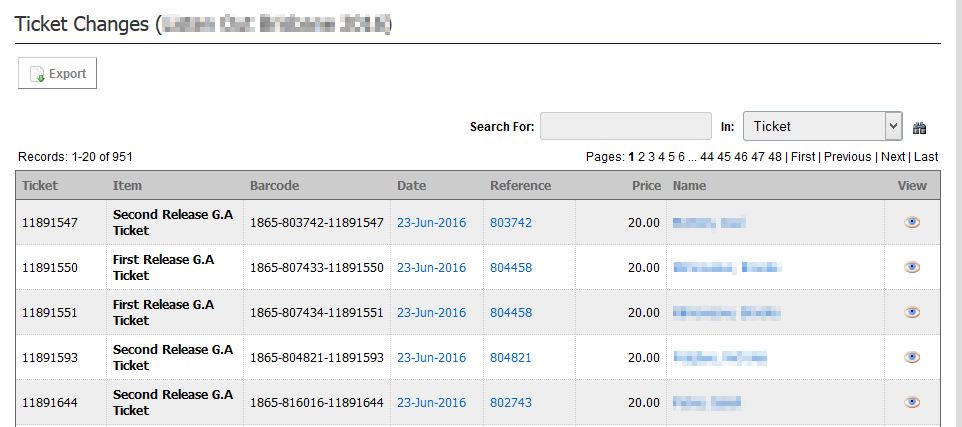
- Backend - All ticket changes will appear in the ticket holder's details
 As well as under the Ticket Changes tab on the left hand side
 Membership: The Membership tab allows organisations who are also using the SportsTG Member Database to link their event to their members.
- Public display: Choose whether this Ticketdesq form will open to public display
- Default Members / Subscriptions Types: If you have Members set up, you can allocate this ticket form to a specific member type or subscription type.
- Member Login Required: Select Yes or No depending on if this option is applicable to your ticket form