
Quick Steps: Events > Click on the Event > Basic Information > Edit
1. Within the Management Console, select Events from the top menu, then click on the name of the event, or the Event Console button to enter the Event Console
2. Select Basic Information from the expanded left menu
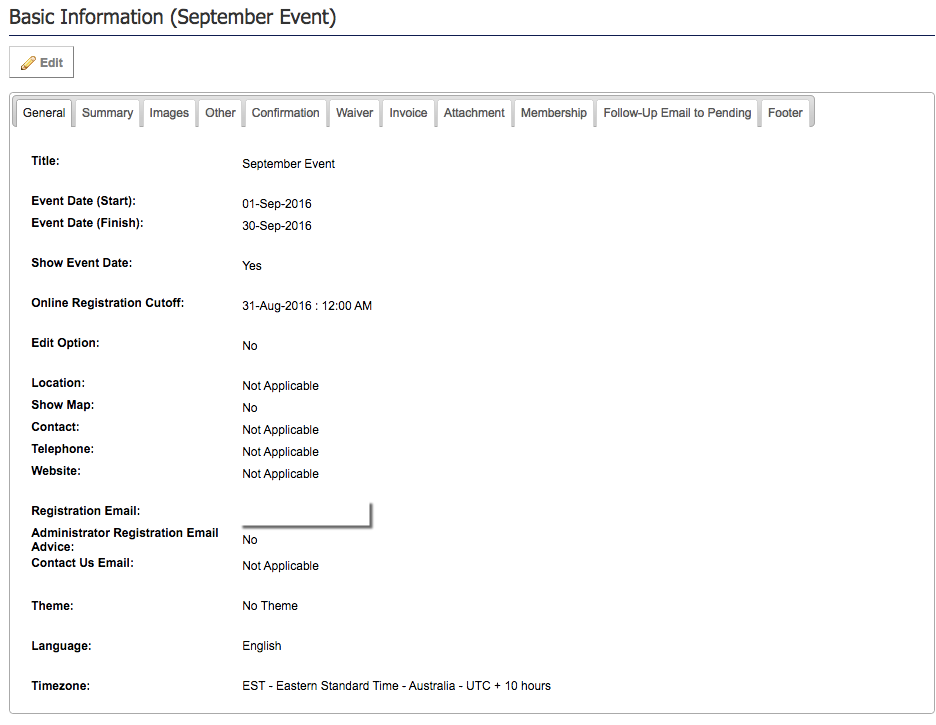
3. Click Edit at the top of the page
4. Now you can set up all of the basic details that make up your event
You have already set up your Event Name and Dates in the first step, now its time to complete the rest of the information. Use the information below to guide you how to complete each section and whether it is relevant to your event
General Tab
Edit Option: allows Entrants to go back in and make changes to their entry at a later date. This can be set to Yes or No, and if set to Yes, a date at which entrants can no longer make changes should be set in Edit Option Cutoff
Location: Insert the Location of the Event. If you use the name of the location found in Google Maps and set Show Map to Yes, it will display the location of your venue on the front page of the Events form
Contact Details: The Contact should list the name of the main point of contact for the event, then below the main Telephone line and the event's Website
Email Addresses: There are three email addresses that can be added to the Basic Information. The main Registration Email, which you would have already completed. This is the main email address for the event. The Administrator Email, which is used if Administrator Email Advice is set to Yes. This option sends the Administrator an email every time an entry is received to the event. Finally, the Contact Us Email can be set, this shows on the Contact Us page on the Events form. These three fields can all contain the same email address if required
Theme: Your theme will be set up in the next step, and relates to the colours and fonts for your form
Timezone: Select the appropriate Timezone for your event so that your entries close off at the correct time
Summary Tab
The Summary will display on the front page of your Events form, providing entrants information about your event before they register
Images Tab
This is where you can upload images for your Events form. We'll cover this further in Step 3
Other Tab
Entrants Limit: You have the ability to set an overall limit on how many entrants can enter your event. You can also set a limit on individual Entry Types
Entrants Limit Pending Timeout: You can select the minutes you would like for the entrant to complete the form. From 1 - 30 minutes.
Export Format: If you are exporting your entrant data into an event management system, you can choose whether you'd like the system to export your information in Excel or CSV format
Payment Options: Depending on the set up of your event, you can give entrants different payment options. Pay Now means all entrants need to pay with a Credit Card when completing their entry online; Pay Later allows entrants to submit their entry online but make payment at a later date; and Both allows entrants to choose either option
Bib System: The Bib System allows events to assign Bib Numbers to entrants as they enter. Set this to Yes, if you want to use the bib system, please see the help article on Setting Up the Bib System for more information
Confirmed Entrants Listing: The Confirmed Entrants Listing allows entrants to check that their entry has been submitted through the Events form. This appears on the public view of the form
Follow Up Email to Pending Entrants: The Events system allows administrators to set up an email that will be sent to entrants who start but don't complete their entry later. Set this to Yes, then choose whether you want to the email to be sent 12, 24 or 36 hours after the entrant failed to complete their entry. See Setting a Follow Up Email for more information
Confirmation Tab
The Confirmation is the message that displays once an entrant has finished their entry. This message displays underneath the entrant's receipt number.
Wavier Tab
The Waiver is the Terms & Conditions that are associated with entry to the event. The Title is what you call the Waiver, eg Terms and Conditions, Entrant Declaration. You should then insert the waiver, and complete the Confirmation message. This is the statement that the entrant declares, and should be something like, 'I have read and agree to be bound by the above Terms and Conditions'.
Invoices Tab
The Invoice is the additional information that you would like included on the email receipt that is sent to entrants. Use the editor to change colours and fonts, as well as add images and links to sponsor information as required.
Attachment Tab
The Attachment allows event organisers to create an additional document that is attached to the receipt as a PDF. This can be used for e-ticket purposes or to outline event information to entrants. Again, use the editor to add images, sponsor information and create a document that is branded to your event.
Membership Tab
The Membership tab allows organisations who are also using the SportsTG Member Database to link their event to their members. Use Member Login Available and Member Login Required to allow your members to use their current Username and Password to login and register for the event, and Allow Entry to open your event up to members who also sit within your State or National body.